Enter your domain name here:
This blog post will be parametrized for your case
Why installing SSL certificate?
SSL certificate is used for encrypting the data transfered between your website and it’s visitors. It encrypts all the data, including passwords, credit cards, files, preventing others from reading them. Nowadays browsers like Google Chrome show security alerts, when such a website has sensitive form data, and is not using SSL encryption. In this tutorial, the Coding Cat will show how to install free Let’s Encrypt SSL certificate for your website, that auto renews on Debian. On other Linux distributions the process is very similar, you can check it here: link.
Let’s Encrypt certificates expire in 90 days, but you can automate renewal, in this article we will show how. There is also a limit: 20 certificates per week. More about the limit: link.
Before installing the certificate make sure you have domain properly installed. If not, check out our tutorials How to install LAMP and How to configure a domain.
Installing certbot
First you need to add jessie-backports to your sources.list:
sudo sh -c 'sudo echo "deb http://ftp.debian.org/debian jessie-backports main" >> /etc/apt/sources.list'
Then update:
sudo apt-get update
Installing certbot for Apache:
sudo apt-get install python-certbot-apache -t jessie-backports
Installing certbot for Nginx:
sudo apt-get install python-certbot-nginx -t jessie-backports
Installing certificate for a domain
For Apache configuration run:
sudo certbot --apache
For Nginx:
sudo certbot --nginx
You should see something like this:

Enter numbers of domains you want to enable HTTPS separated by commas or spaces, like “1 2 3” and press enter.
Then enter your email address, which will receive important notices from Let’s Encrypt about security issues and expiration. Then accept Terms of Service by typing “A” and pressing enter.
∗If you see an error like this (Apache):
Expected </VirtualHost> but saw </VirtualHost></IfModule>
Just add an enter to the end of your VirtualHost configuration file and try again by “sudo certbot –apache” command.
If all went well, you should be able to choose “Easy” or “Secure” mode. In “Easy” mode, all requests are allowed, http and https. With secure mode, all http requests are redirected to secure https. Choose one and press enter.
Next you should see “Congratulations! You have successfully enabled https://{domain}” message
Navigate to your website and check if https works, you can also test on ssllabs.com:
https://www.ssllabs.com/ssltest/analyze.html?d={domain}
Or sslhopper:
https://sslshopper.com/ssl-checker.html#hostname={domain}
Configuring auto renewal
To renew your certificates you can use a command:
sudo certbot renew
If you want to automate that, you need to register it on cron table:
sudo crontab -e

Choose your editor and press enter.
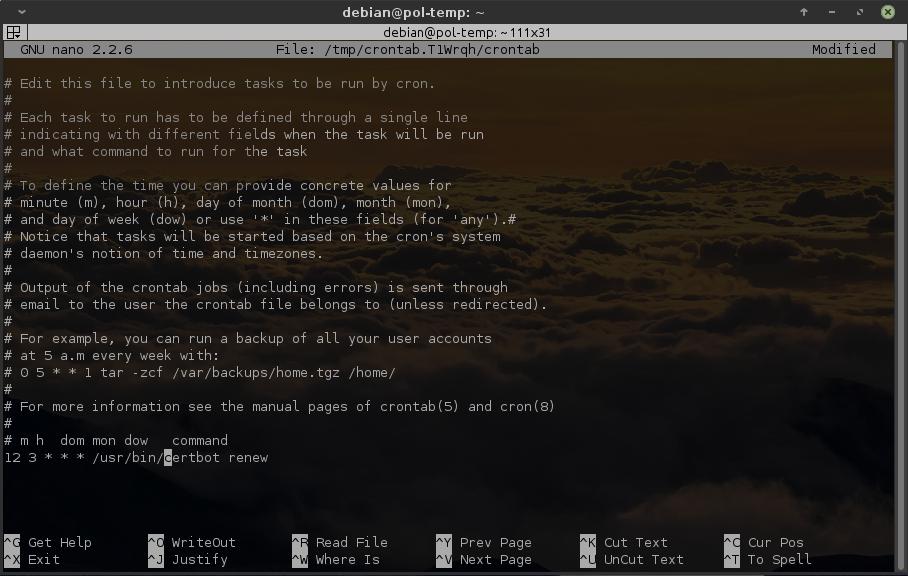
Now, at the bottom, add a line:
12 3 * * * /usr/bin/certbot renew
so it looks like this:

Your auto-renewal task will be executed every day at 3:21 AM. Don’t worry, certbot will renew only certificates that are soon to expire.
