In the past years, I had a few different and weird business ideas / side hustles that I started, but in the end, many of them failed. Recently I decided that I’ll write a blog post about each one, mostly for myself to understand what went wrong and what I could do better in the future. They failed but were just fun to do and I got a lot of experience and good memories. From each one I learned something, but also I can see some common mistakes repeated each time.

Back In 2015, I started a small business – a website (twoja-foremka.pl AKA your-cookie-cutter), where you could upload your custom shape (PNG file) and I printed a cookie cutter from it in 3D. It was my third business about 3D printing that I started – I’ll write about them in the next posts.

How it was working?

All were semi-automated. I wrote a script that from the image file (png) was generating a 3D model suitable for a 3D printer. Then I was sending the model over email to someone that I found on the internet who was printing it and sending it directly to the customer.

I didn’t have many customers, just a few, but the margin was nice. I charged $30 for one, and printing cost me about $4, shipping $1. So I had $25 in my pocket – just for putting the PNG to the script and sending an email with an STL file to someone who prints it – about 5-10 minutes of work. For more technical details scroll down below to the last section.

What was done wrong?

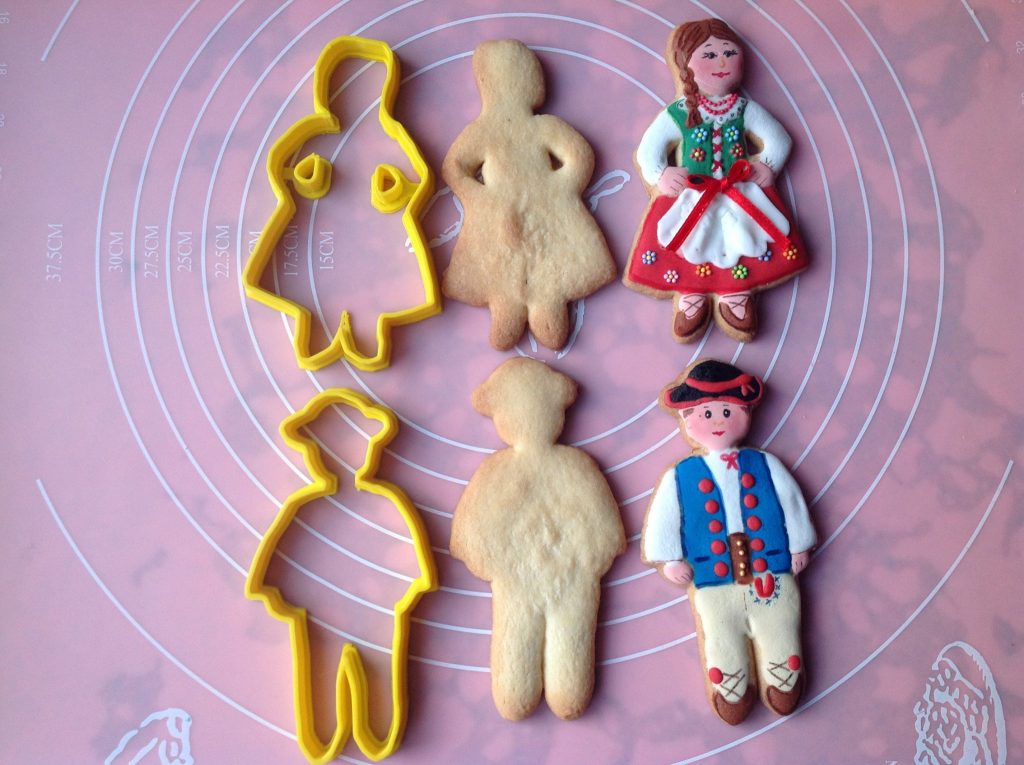
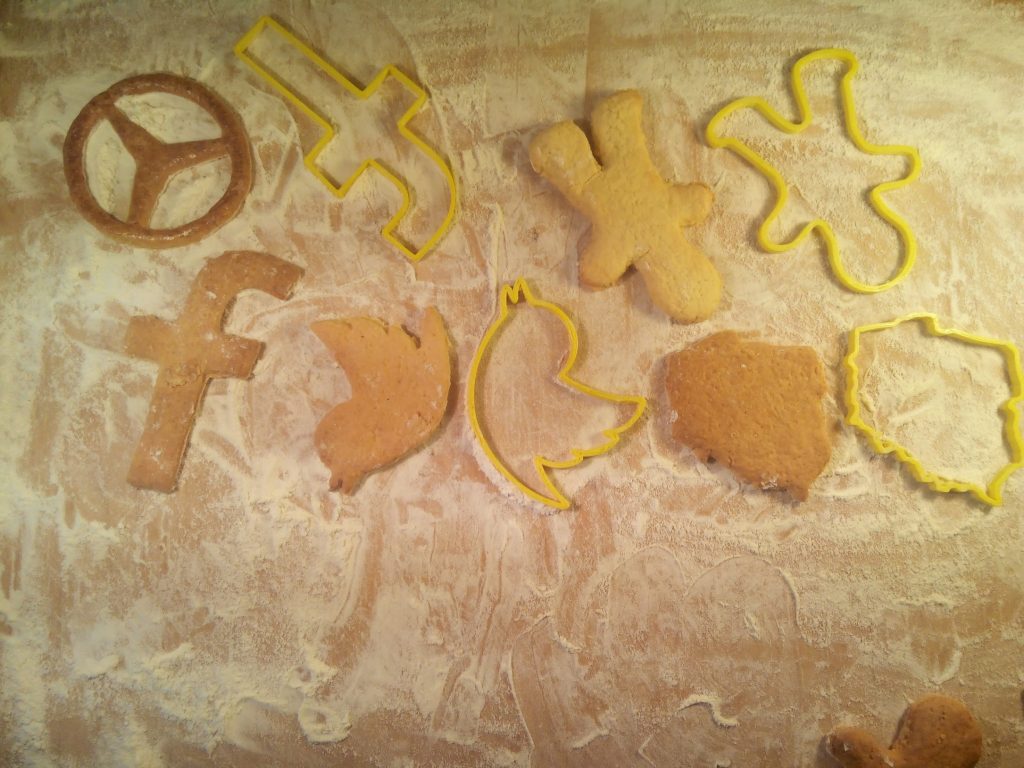
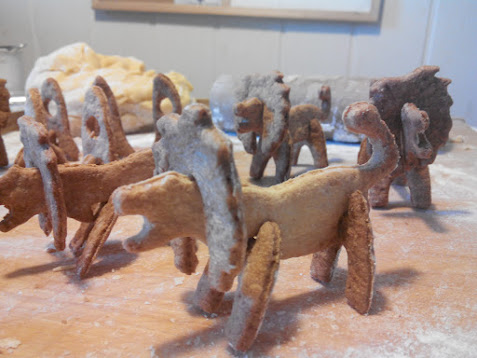
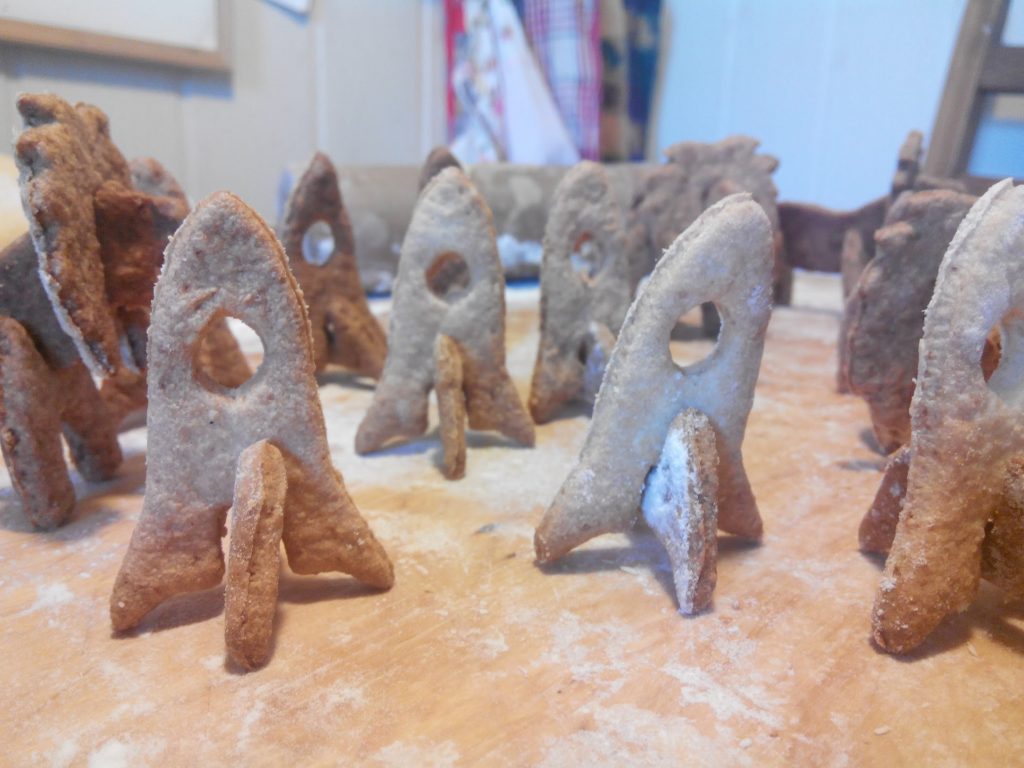
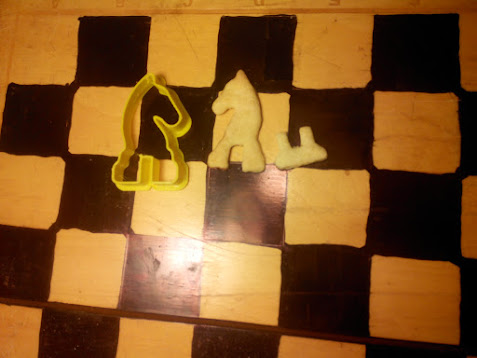
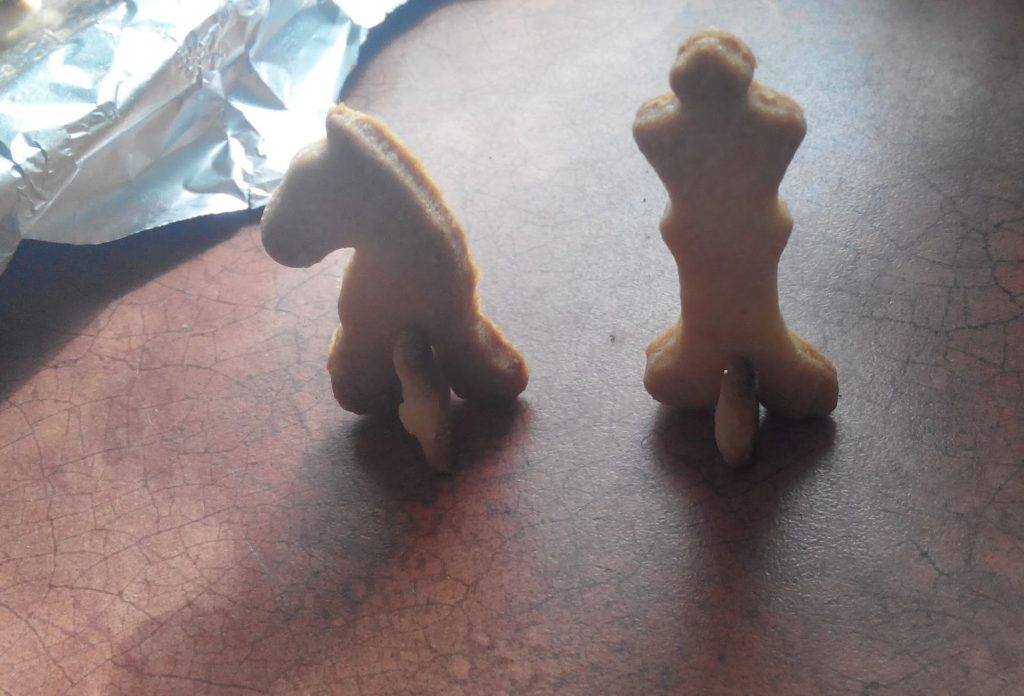
I did have a 3D printer (RepRap) so I tested it myself and I was making cookies for the first time in my life. That was the first problem, I didn’t know anything about making cookies. But it turned out easy (thanks mom for helpšŸ˜‚) and here are some photos of cookies I’ve made while testing:

The biggest issue was that I didn’t have a clue who my customer was. I 100% focused on the technical side – which was fun for me. It’s not a business mindset. I was thinking that those cookie cutters are so cool because you can make a cookie from anything, like company logos or 3D puzzles, chess, lions, houses, etc. Imagine inviting your client to your office, and the cookies on the table are logos of their company – that’s brilliant. So I thought that maybe It’ll go viral somehow.

I didn’t write to companies or talk to the right people, I just set up Google / Facebook ads and I thought it will do the job for me, but it didn’t work this way. I also had a Facebook page (still online https://www.facebook.com/twojaforemka) and an online shop (PrestaShop), with ready-to-buy cutters, but with no traffic. So as I finished the interesting – technical side, I got bored and just left to the next idea – another big issue when you start a business.

What could be done better?

I should have found a non-technical partner that knows what to do to find customers and research the market. I didn’t have any motivation to do this. When someone says “marketing” or “sales” I just get instantly bored, I just can’t do this it is so boring for me. So I think the best thing I should have done is find a partner. But where or how can someone like this be found, someone that you can trust? If you know, post a comment, or write to me directly on my LinkedIn profile. Or maybešŸ¤”.. maybe this is a good business idea! A portal that combines technical people like me with people of marketing/sales?

What I’ve learned?

Aside from the issues above and technical stuff, the thing that had the biggest impact on me was the margin. I never thought that I could set it so high. It was shocking for me back then, that I can sell for $30 with costs around $5, with almost any work within the order.

Technical details – how I was converting PNG to a 3D ready-to-print STL file?

I already had some experience with Blender and using it programmatically with Python scripts. The mechanism was really easy. First, the PHP script was preparing the image, generating a stroke on it. Then the commands were run:

  • mogrify -flop $filename
  • convert $filename -transparent white $filename
  • convert $filename -transparent black $filename
  • convert $filename -fill black -opaque red $filename
  • convert -flatten $filename $filename.ppm
  • potrace -s $filename.ppm

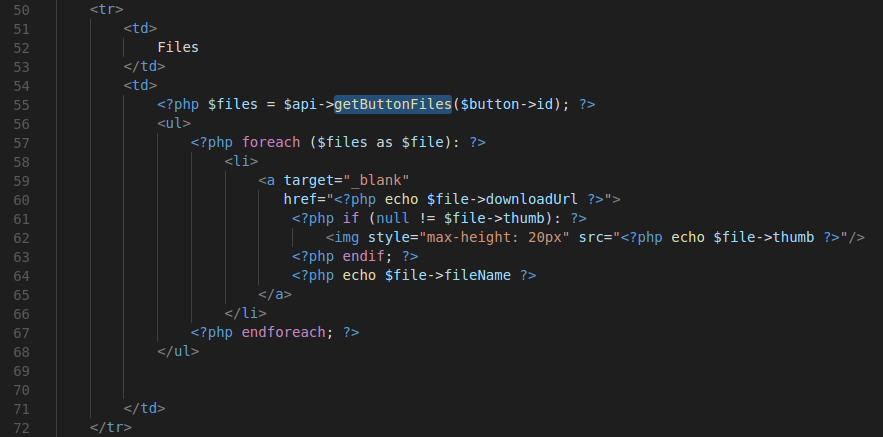
Then the image was opened in Blender, and the script there was doing the magic. It was loading the SVG and extending the mesh upwards. Then it was exporting it to the STL file that can be sent directly to the printer. There was also a mechanism for creating 3D renders. There is the Python code for generating the model. I doubt it works now, as Blender often changes its API, and it is from 2015. I haven’t tested it now either.

import bpy, sys, copy, mathutils,time,math,array,bmesh,math


args = sys.argv
argv = args[args.index("--") + 1:]

def getArg(index):
    if (len(argv) <= index):
        return ""
    else:
        return argv[index]

def enterEditMode():
    bpy.ops.object.mode_set(mode='EDIT')

def enterObjectMode():
    bpy.ops.object.mode_set(mode='OBJECT')

def selectAllObjects():
    bpy.ops.object.select_all(action='SELECT')
    
def deselectAllObjects():
    bpy.ops.object.select_all(action='DESELECT')
    
def selectMeshAll():
    bpy.ops.mesh.select_all(action='SELECT')
    
def deselectMeshAll():
    bpy.ops.mesh.select_all(action='DESELECT')
    
def getAllObjects():
    return bpy.data.objects

def getMeshObjects():
    result = []
    for item in getAllObjects():  
        if item.type == 'MESH': 
            result.append(item)
    return result
        
def getSelectedObject():
    return bpy.context.scene.objects.active

def setSelectedObject(obj):
    bpy.context.scene.objects.active = obj
    
    
# MESH UTILS

class SizeInformation:
      min = None
      max = None
      size = None
      center = None
      biggest = None
      def __init__(self, min, max):
          self.min = min
          self.max = max
          self.center = self.min + ((self.max - self.min) / 2)
          self.size = self.max - self.min
          self.biggest = self.size.x
          if self.size.y > self.size.x:
              self.biggest = self.size.y
              if self.size.z > self.size.y:
                  self.biggest = self.size.z
          elif self.size.z > self.size.x:
              self.biggest = self.size.z
              
      
      def printInformation(self):
          print("Min: ", self.min)
          print("Max: ", self.max)
          print("Center: ", self.center)
          print("Size: ", self.size)
          
      def isNull(self):
          return self.size.x == 0 or self.size.y == 0 or self.size.z == 0

def getSizeAll():
    max = None
    min = None
    for item in bpy.data.objects:  
        if item.type == 'MESH':  
            for vertex in item.data.vertices:
                position = vertex.co  # + item.location
                if max == None:
                    max = copy.copy(position)
                if position.x > max.x:
                    max.x = position.x
                if position.y > max.y:
                    max.y = position.y
                if position.z > max.z:
                    max.z = position.z

                if min == None:
                    min = copy.copy(position)
                if position.x < min.x:
                    min.x = position.x
                if position.y < min.y:
                    min.y = position.y
                if position.z < min.z:
                    min.z = position.z
    if max == None:
        max = mathutils.Vector((0.0,0.0,0.0))
    if min == None:
        min = mathutils.Vector((0.0,0.0,0.0))
    return SizeInformation(min, max)

def scaleAll(scale):
    for item in bpy.data.objects:  
        if item.type == 'MESH':
           item.scale *= scale
           item.location *= scale
           bpy.context.scene.objects.active = item
           bpy.ops.object.transform_apply(scale=True)
           bpy.ops.object.transform_apply(location=True)
           bpy.ops.object.transform_apply(rotation=True)

def clean(obj,normals=False):
    bpy.ops.object.select_all(action='DESELECT')
    obj.select = True
    bpy.context.scene.objects.active = obj
    bpy.ops.object.transform_apply(scale=True)
    bpy.ops.object.transform_apply(location=True)
    bpy.ops.object.transform_apply(rotation=True)
    bpy.ops.object.mode_set(mode='EDIT')
    bpy.ops.mesh.remove_doubles()
    bpy.ops.mesh.select_all(action='SELECT')
    bpy.ops.mesh.quads_convert_to_tris()
    if normals:
        bpy.ops.mesh.normals_make_consistent(inside=False)
    bpy.ops.object.mode_set(mode='OBJECT')

# LIB END


svg1 = getArg(0)
svg2 = getArg(1)
y = float(getArg(2))
out = getArg(3)

height = 10.0
handleHeight = 1.0


bpy.ops.import_curve.svg(filepath=svg1)
bpy.ops.import_curve.svg(filepath=svg2)


for obj in getAllObjects():
    deselectAllObjects()
    setSelectedObject(obj)
    obj.select = True
    bpy.ops.object.convert()


selectAllObjects()


size = getSizeAll()

scale = y / size.size.y
scaleAll(scale)

objects = getMeshObjects()

def extrude(obj,height):
    enterObjectMode()
    deselectAllObjects()
    setSelectedObject(obj)
    enterEditMode()
    bpy.context.tool_settings.mesh_select_mode = (False, False, True)
    selectMeshAll()
    vector = mathutils.Vector((0.0,0.0,height))
    bpy.ops.mesh.extrude_region_move(MESH_OT_extrude_region={"mirror":False}, 
                                TRANSFORM_OT_translate={"value":vector,"release_confirm": False})
    
def run():
    i = 0
    for obj in objects:
        theHeight = handleHeight
        if (i < len(objects)/2):
            theHeight = height
        extrude(obj,theHeight)
        enterObjectMode()
        clean(obj)
        
        i += 1
    for obj in getMeshObjects():
        obj.select = True
run()
bpy.ops.object.select_all(action='SELECT')
bpy.ops.export_mesh.stl(filepath=out)

The end

The next post will be about a 3D people scanner machine that I’ve built šŸ˜… . Bigger failure than this above, but also more interesting.

Did you enjoy the post? Or maybe did you have a failed project like this in the past? Let me know in the comments.

This simple Automate flow plays custom alarm-like sound, when your phone receives a SMS message which contains “alarm” word in it.

It could be useful, when you want for example play custom alarm for specific server events. As it is SMS based, it will not require mobile data transfer turned on.

How to set it up? You will need Automate app to be installed on your phone. Then you can download and import the flow from here:
https://drive.google.com/file/d/1iKlIcS-Bs6I1ElPKeZkd0j9XPzrr1vyI/view?usp=sharing

or set it up yourself following the steps from this video:


Using ffmpeg to convert them to prores

DaVinci Resolve in a Free version doesn’t support importing media ecnoded with popular encoding format. You can find on the internet some solutions to this problem, but they need importing the files to one program then exporting etc… This takes a lot of time. The Coding Cat found a simple solution for this. Just use ffmpeg (avconv should work also) and use a command below:

ffmpeg -i YOURFILE.mp4 -c:v prores -profile:v 3 -c:a pcm_s16le converted.mov

Replace YOURFILE.mp4 with your file name, and you will need to have ffmpeg installed on your system.

After the process is completed, there will be a new file in “mov” format, that you can import into DaVinci Resolve

Convert all files in the directory

There is a command to convert all mp4, mts, mov files in the current directory. It doesn’t convert already converted files

find . -maxdepth 1 -type f \( -iname "*.mp4" -o -iname "*.mov" -o -iname "*.mts" \) ! -iname "*-conv.mov" -exec sh -c "[ ! -f {}-conv.mov ] && ffmpeg -i {} -c:v prores -profile:v 3 -c:a pcm_s16le {}-conv.mov" \;

Note: It was tested on Linux and Mac. Videos were from Sony A5000, Nikon P900 and GoPro 7

Developer Tools for iOS and Android

Yes, you see right! That’s iPad with Web Developer Tools on the photo above! There is a new web browser app called Mr Bug (mrbug.io) for iOS and Android that has built in DOM Inspector, JavaScript console, Network monitor and more. Now you can check a bug on your website even if you are out of your office, or develop your new web app right from your tablet or phone.


Some key features:


Javascript console = Run any JavaScript command using Console tab:


DOM Inspector = Inspect DOM elements, check what is messing your website:


Network Monitor = Debug your AJAX requests, check body and headers:


This is a story of making an app called Riskometer. The aim of the app was to prevent coronavirus to spread. I will explain how the idea worked from the programmer point of view. Finally the app didnā€™t start off, because the polish government (which we were talking with for about 3 weeks) refused it, Iā€™ll explain why in the later part.


In march 2020, in the time of the biggest lockdown, one of my colleges asked me to join the team that is working on the app for preventing coronavirus. In the team there was already about 30 people, but they didnā€™t have any programmers. I joined, cause I like interesting projects and I thought what bad can possibly happen. Maybe our app will save someoneā€™s life.. That was worth the try.


The idea was simple .. in theory. Google is saving history of location of your mobile device if you have Google account connected – most people have. Now the app should take this data, and analyze it, comparing with location history of people that had covid-19 diagnosed. First, my job was to check out if it is even possible to do with the data that is provided by Google Takeout json files – the only way to get this location history. The big json file in the Takeout contains only GPS coordinates, timestamps and type of transport. The problem with this data was, the GPS coordinates are not accurate here. It can be checked if someoneā€™s path crossed the path with someone infected, but with very bad accuracy – they can be on other side of a street for example. Also checking that someone crossed the path with the infected one was not the point at all. From the government, weā€™ve get restrictions, when we can assume that someone had a contact with COVID-19 infected person:


  • a person lives in the same house with someone infected by COVID-19
  • a person had direct physical contact with someone infected by COVID-19
  • a person had contact with someone infected by COVID-19 in less than two meters and more than 15 minutes 
  • a healthcare worker or another person that looks after someone infected by COVID-19
  • a person that was in the same plane in the distance of two places (each direction) with someone infected by COVID-19


Weā€™ve focused on the point when you meet infected person for 15 minutes in less than 2 meters. That was not possible to check it just with the GPS coordinates from Google Takeout. Fortunately in the zip package, there was more files that we could use. There was a folder named ā€œSemantic Location Historyā€ that contained JSON files for each month with a bit different data. There was more useful data including activities and visited places in the sequence of visited place -> activity -> visited place -> activity..

For example if you were in some place (house, shop, mall) or you’ve travelled from place A to place B indicating which type of transport did you use like car, bus, on foot etc. 

The most accurate result that we could get from the data that worked with the rule “2 meters for 15 minutes” was to detect if someone travelled in a car with infected one. That was very easy to check with this data. There is information about starting place, ending place, starting time, ending time and type of transport. If this parameters equals to the data of another person, that is very highly probable, that those two people was travelling in the same car, so the distance between them must have been less than two meters. 

Other options were to check if someone was working in the same place, if someone live in the same house, if someone was in a shop / barber / dentist etc. where worked someone infected. But they were not as accurate as travelling in the car, so it ended just as additional information in the app that can be shown.


In the first few days of the project we’ve asked volunteers on our Facebook group to get 100 Google Takeout json files (from 100 different people), for the demo. We’ve get them in 3 days, so we could start with creating the mvp. The app was a very simple php (symfony + propel) application that analyzed the json files and put them into the database. After you uploaded your Google Takeout zip file, It just checked if you travelled with someone infected (randomly at first) in a car, or have you been in same place and then displaying you a list of these activities.


The results in this mvp looked like this:


The main problem with the Google Takeout zip packages was providing them by the user. To download the package, user has to login into his Google account, navigate to takeout.google.com, from the list of available data select only location history and then click on export. Then he waits until the package is ready for download (may be a few minutes) and then finally he can download the takeout file. After the file is downloaded, he can upload it to the app, or extract the zip package and select json files from only last month. 


The process was too complicated for a regular person, we had to automate it a bit.  From Google there was no any API, or any other way to get this data. There was no way to automate it using just a web application. 


With another programmer who recently joined the team working on bluetooth-based module for the application, we came out with an idea of using WebView component to click-through the whole download process. The only thing that user had to do was to login into his Google Account, with all the steps running automatically in the background. Two of us (with some help in design and styling from other people), weā€™ve made a working mobile app in just one weekend. It worked as it was expected, the user opened the app, logged into his Google account, and after clicking the start button all the magic happened. In the hidden WebView component, the injected javascript code clicked on each button to finally download the file. After the app detected that the file is downloaded, it unpacked the zip and uploaded required json files to the server and displaying the result.


That was how the final version of the app looked like:


After presenting the app to the government they asked us how much it will be cost for servers for maintaining the server side code. That was really hard to guess. With a help of another programmer that is a specialist in AWS, weā€™ve came out with the maximum monthly price of ā‚¬50k (for a whole nation using it, about 0.2 cents for person a month). After this the whole situation all started to be rough. Now the method of gaining the data from users was the problem (GDPR), there was problem that Google may be not able to maintain all the exports at the same time. Even some professor related to the government send an email to everyone involved, that the whole idea of the app is completely wrong, and he presented his research that the GPS coordinates are not accurate, because it canā€™t be compared to his professional gps. He didnā€™t even analyze the way of our app worked, but it didn’t matter. After that the whole project was down. The government said that they will pick some other project, and they did. Theyā€™ve chosen a company called Polidea that was making an open-source app called ProteGo Safe

Temporarily, We Transfer Files

tmp.wtf which stands for Temporarily, We Transfer Files, is the Coding’s Cat new web app. If you want to just quickly share a few files with your friend, without registration etc. this service is for you. The files will be removed after seven days.


Get the source code

The second reason why the app was created is to show use case for the planeupload.com upload widget. The whole project was created in just a few hours and if you wan’t to get the source code (NodeJS), send an email on codingcatcodes@gmail.com

I’ve had some document that I couldn’t read on Android phone or iPad showing error because of read only mode, that the mobile devices could not handle. I wanted to read it on other devices than the PC, so I wrote a little ‘hack’Ā  in JS.

Note 1: It was tested on Chrome Browser.

Note 2: It converts pages to jpg images. I think it could be done preserving text, but he didn’t have more time for this and jpg solution was sufficient.

Note 3: If you’re getting only part of the document visible, try zooming out your browser and then run the script.

Step by step:

  1. Open the document in Google Docs
  2. Scroll to the bottom of the document, so all the pages are present
  3. Open Developer ToolsĀ on separate window and choose the Console tab
  4. Paste the code below (and hit enter)
    let jspdf = document.createElement("script");
    
    jspdf.onload = function () {
    
        let pdf = new jsPDF();
        let elements = document.getElementsByTagName("img");
        for (let i in elements) {
            let img = elements[i];
            console.log("add img ", img);
            if (!/^blob:/.test(img.src)) {
                console.log("invalid src");
                continue;
            }
            let can = document.createElement('canvas');
            let con = can.getContext("2d");
            can.width = img.width;
            can.height = img.height;
            con.drawImage(img, 0, 0, img.width, img.height);
            let imgData = can.toDataURL("image/jpeg", 1.0);
            pdf.addImage(imgData, 'JPEG', 0, 0);
            pdf.addPage();
        }
    
        pdf.save("download.pdf");
    };
    
    jspdf.src = 'https'+'://'+'cdnjs'+'.cloudflare'+'.com/ajax/libs/jspdf/1.5.3/jspdf.debug.js'; /* had to set it like this, because disqus was breaking the link.. */
    document.body.appendChild(jspdf);
    
  5. Now the PDF should be downloaded

What it does? It iterates trough the document checking for images (Google Drive stores pages as images) then writes it’s contents to a PDF.

Leave a comment if it works for you.

In this tutorial, the Coding Cat will show you how to implement an advanced AJAX PHP uploader, with progress bars, drag&drop, comments, thumbnails etc in just 5 minutes.

We will use a free upload widget from planeupload.comĀ that will store your files on your Google Drive, Dropbox, Amazon S3 or FTP server, and then you can do operations on those files using API requests.


1. First, register on https://planeupload.com, it creates your account with Google or Facebook in just a few clicks. You should see a view like this:

PlaneUpload - connect cloud


2. Connect your cloud by clicking the icon. With Google Drive or Dropbox is just seconds. After that, your cloud will be added to the list:

PlaneUpload cloud list


3. Click on the “Show buttons” button, and then on “Click here to add your first button

Add button


4. Your first upload button is created. But we need to embed it in our web application. So go now to “Installation code” tab, and click on “Download prepared code“:

Download prepared code


The ZIP package contains ready to use examples with your PlaneUpload’sĀ API key already generated. After unpacking, you should see files like this:

file list


5. Move them into your web server directory, and open your browser at address http://localhost/{your directory}/form-attachment.html

You will get example view:

form attachment example


6. Attach some files and click the “submit” button. Form is submitted to the “form-attachment-submit.php” script which executes “confirmAttachment” method:

(you can open now the “form-attachment-submit.php” file in your favorite IDE)

After that, a new button with a new directory in your cloud is created, and uploaded files moved to it. The button object is returned. Now you can set it to your app’s database for later use, and render it on your application’s view with simple code:


On the browser side, you’ll get an example view, that contains some basic informations:

uploaded

Section that is most interesting to us is the “Files”. Those are fetched from API and parsed with our php script, so we can so some operations on it:

code files


7. Short video – check out this short 5 min video for more examples of usage

The Coding Cat has tricked you! The best OS for programmers is of course Linux!


So in this article it will show you 10 reasons why Linux is the best operating system for programmers.


1. Linux is not as easy to maintain as other OS’es.

Someone would think this is a bad thing. Well, not for programmers. With Linux you have to think more while configuring or installingĀ (not apt-get, yum etc.) new programs and features. When something breaks, you can spend hours browsing the internet on the right solution. And the most important part here –Ā you learn new things! Windows or OSX makes developers lazy. They are just calling the support, reinstalling the whole Windows, or buying a brand new Mac.

2. In Linux you are the owner of your computer

You can change everything as you want. Wanna totally different interface looks? No problem! Just install different desktop environment like Xfce or KDE and set up everything as you wish. Some process is not responding, eating too much your resources, or you just want to kill it for no reason? Type “kill <pid>” or “killall <name>” and get rid of it instantly.

3. Workspaces

Workspaces

This is one of the Coding Cat’s favourite features. You can work simultaneously on different subjects, just only switching to different workspace. For example in the first workspace you have your project’s code editors on second there is some operation running that require many windows for monitoring and third is your coffee-break workspace, where you read the Coding Cat’s blog while having a break. The Coding Cat has three monitors and six workspaces set up, that gives him 18 different screens!

4. Terminal

Terminal

In Linux, everything can be done using terminal. You don’t have to go clicking through the jungle of windows when you want to change or check something in your system. Ctrl+alt+t and there you go. All file operations, installing software, checking your computer resources consumption etc. If you want a article about most useful Linux commands, leave a comment here.

..And this is how it looks like in Windows:

Working with windows

5. CRON

Want to run some of your scripts every hour, every two minutes or only sunday at 22PM? Type “crontab -e” in your terminal, and put here your command. As simple as that. Well, there are also some wisest Windows wizards, that can set up this also in their OS. But only check yourself some tutorials on that – you’ll see how f** is that.

6. Customization trough Bash and scripting

You can customize everything with scripting. Don’t like some part of your system, want to change some behavior or add automated features yourself? Linux is open for everything you need.

Psst. want to setup your wallpaper that has a lot of useful information instead of only a picture, and doesn’t consume system resources? Like this:

Linux custom wallpaper with varialbes

That’s very easy to set up. If you wish tutorial about that, leave a comment.

7. Installation from software repositories

When you want to install something on Windows, you have to open your Internet Explorer, then go to some website, download some fishy exe file, and pray, that this is not some malware like WannaCry. In Linux, on most popular programs, just type “apt-get install <name>” (distro dependent), and you’ll get your soft from a secure place. The other benefit from that is you can automate installation of programs you like, in a very easy way. If for example you change your computer often, or have to install the same things on different machines, just create a Bash script that installs everything in one command.

8. Security and encryption

Linux has a lot better user privileges on files resolved than Windows. You don’t need there a heavy antivirus software army that keeps your computer safe and consumes a half of your CPU while scanning trough everything. In Linux, you can set up whole partition encryption, and then your home folder encryption, so your most important code can be encrypted twice by default!

9. Linux servers

Most of the internet runs on Linux servers. If you get familiar with this system on your desktop, it’ll be easier for you to manage servers where you run your projects.

10. Prestige

how they see you

When some programmer asks you: “Which Windows do you have installed on your PC?” and you respond “Linux“, you are like some black magic wizard and Anonymous hacker to him, at the same time. And when he starts complaining, how his Windows is bad and slow, and how last time someone hacked his webcam, you redirect him to this blog post, so he can change his OS, before it’s too late.

Offtopic – Mr. Robot

If you like Mr. Robot series, you must check their website, is the best website made by humans that the Coding Cat has ever seen!

https://www.whoismrrobot.com/

This is a website:

Mr robot website screenshot


Enter your domain name here:

This blog post will be parametrized for your case

Why installing SSL certificate?

SSL certificate is used for encrypting the data transfered between your website and it’s visitors. It encrypts all the data, including passwords, credit cards, files, preventing others from reading them. Nowadays browsers like Google Chrome show security alerts, when such a website has sensitive form data, and is not using SSL encryption. In this tutorial, the Coding Cat will show how to install free Let’s Encrypt SSL certificate for your website, that auto renews on Debian. On other Linux distributions the process is very similar, you can check it here: link.

Let’s Encrypt certificates expire in 90 days, but you can automate renewal, in this article we will show how. There is also a limit: 20 certificates per week. More about the limit: link.

Before installing the certificate make sure you have domain properly installed. If not, check out our tutorials How to install LAMPĀ and How to configure a domain.

Installing certbot

First you need to add jessie-backports to your sources.list:

sudo sh -c 'sudo echo "deb http://ftp.debian.org/debian jessie-backports main" >> /etc/apt/sources.list'

Then update:

sudo apt-get update

Installing certbot for Apache:

sudo apt-get install python-certbot-apache -t jessie-backports

Installing certbot for Nginx:

sudo apt-get install python-certbot-nginx -t jessie-backports

Installing certificate for a domain

For Apache configuration run:

sudo certbot --apache

For Nginx:

sudo certbot --nginx

You should see something like this:

Certbot - choosing domain

Enter numbers of domains you want to enable HTTPS separated by commas or spaces, like “1 2 3” and press enter.

Then enter your email address, which will receive important notices from Let’s Encrypt about security issues and expiration. Then accept Terms of Service by typing “A” and pressing enter.

āˆ—If you see an error like this (Apache):

Expected </VirtualHost> but saw </VirtualHost></IfModule>

Just add an enter to the end of your VirtualHost configuration file and try again by “sudo certbot –apache” command.

If all went well, you should be able to choose “Easy” or “Secure” mode. In “Easy” mode, all requests are allowed, http and https. With secure mode, all http requests are redirected to secure https. Choose one and press enter.

Next you should see “Congratulations! You have successfully enabled https://{domain}” message

Navigate to your website and check if https works, you can also test on ssllabs.com:

https://www.ssllabs.com/ssltest/analyze.html?d={domain}

Or sslhopper:

https://sslshopper.com/ssl-checker.html#hostname={domain}


Configuring auto renewal

To renew your certificates you can use a command:

sudo certbot renew

If you want to automate that, you need to register it on cron table:

sudo crontab -e

Crontab - choose an editor

Choose your editor and press enter.

Now, at the bottom, add a line:

12 3 * * * /usr/bin/certbot renew

so it looks like this:

Crontab - edit

Your auto-renewal task will be executed every day at 3:21 AM. Don’t worry, certbot will renew only certificates that are soon to expire.